
Burnt Cheesecake (Upgraded Recipe!)
First things first, the reason for the ‘Upgraded’ in the title is because I’ve made a previous version of this cheesecake, a close replica of the cheesecake from The Tokyo Restaurant in Kuala Lumpur, which has generated hype in Malaysia near equivalent to La Viña in San Sebastian (the pintxos bar largely credit for popularising Basque burnt cheesecake throughout the world).
Now that recipe, while good, was written and developed in 2018 for a local magazine, Buro. That recipe was 80% of the way to what The Tokyo Restaurant serves, but I always felt that it could be silkier, smoother, custard-ier.
So now, with two more years of cooking under my belt, it’s high time to improve on my old recipe! And oh improve on it I did.
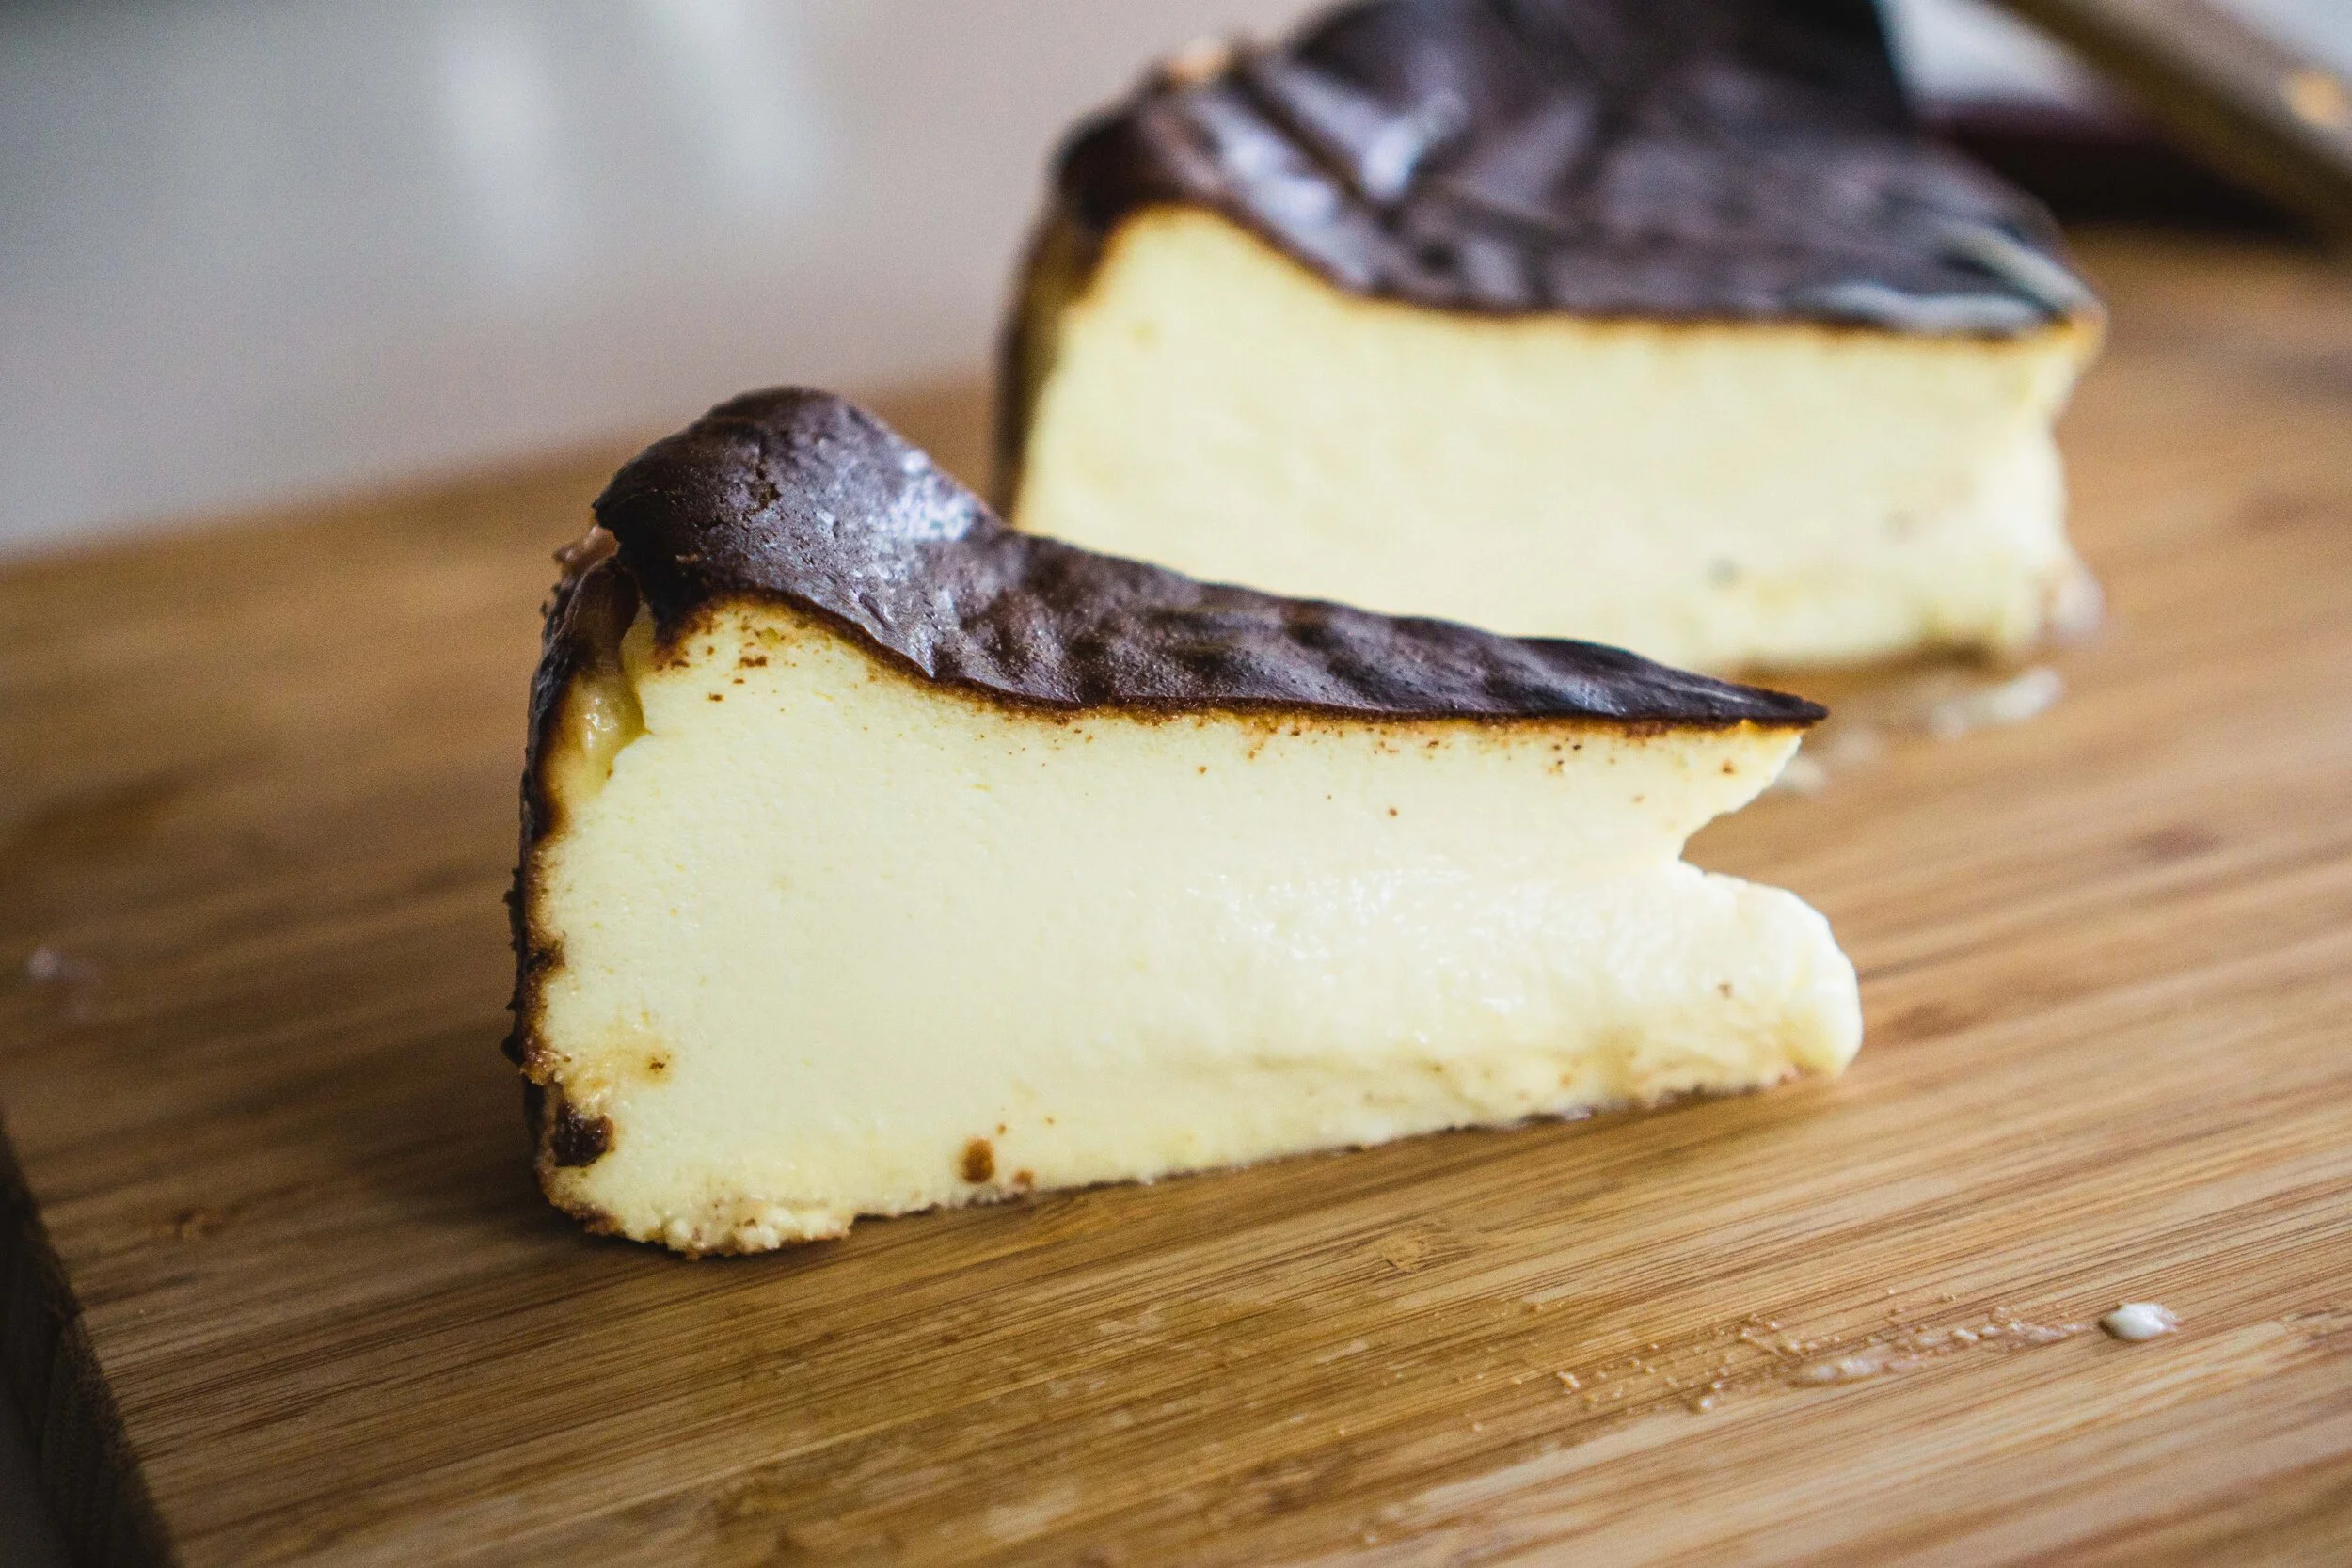
At first glance, it doesn’t seem like much has changed. After all, most cheesecakes of this style are made up of four constituent ingredients—cream cheese, sugar, eggs, and cream—and this is no different. But it’s precisely because there are so few ingredients that makes this cheesecake so tricky to get right. (And trust me, I’ve tested quite a few.) Anyway, in this new and improved recipe, I upped the ratio of cream cheese to cream, which helped it from the textural standpoint, to be much smoother and silkier. Also because the added cream cheese also gave it a bit more structure, more holding strength, I was able to reduce the amount of flour used, which means, the texture will be less cakey more custardy.
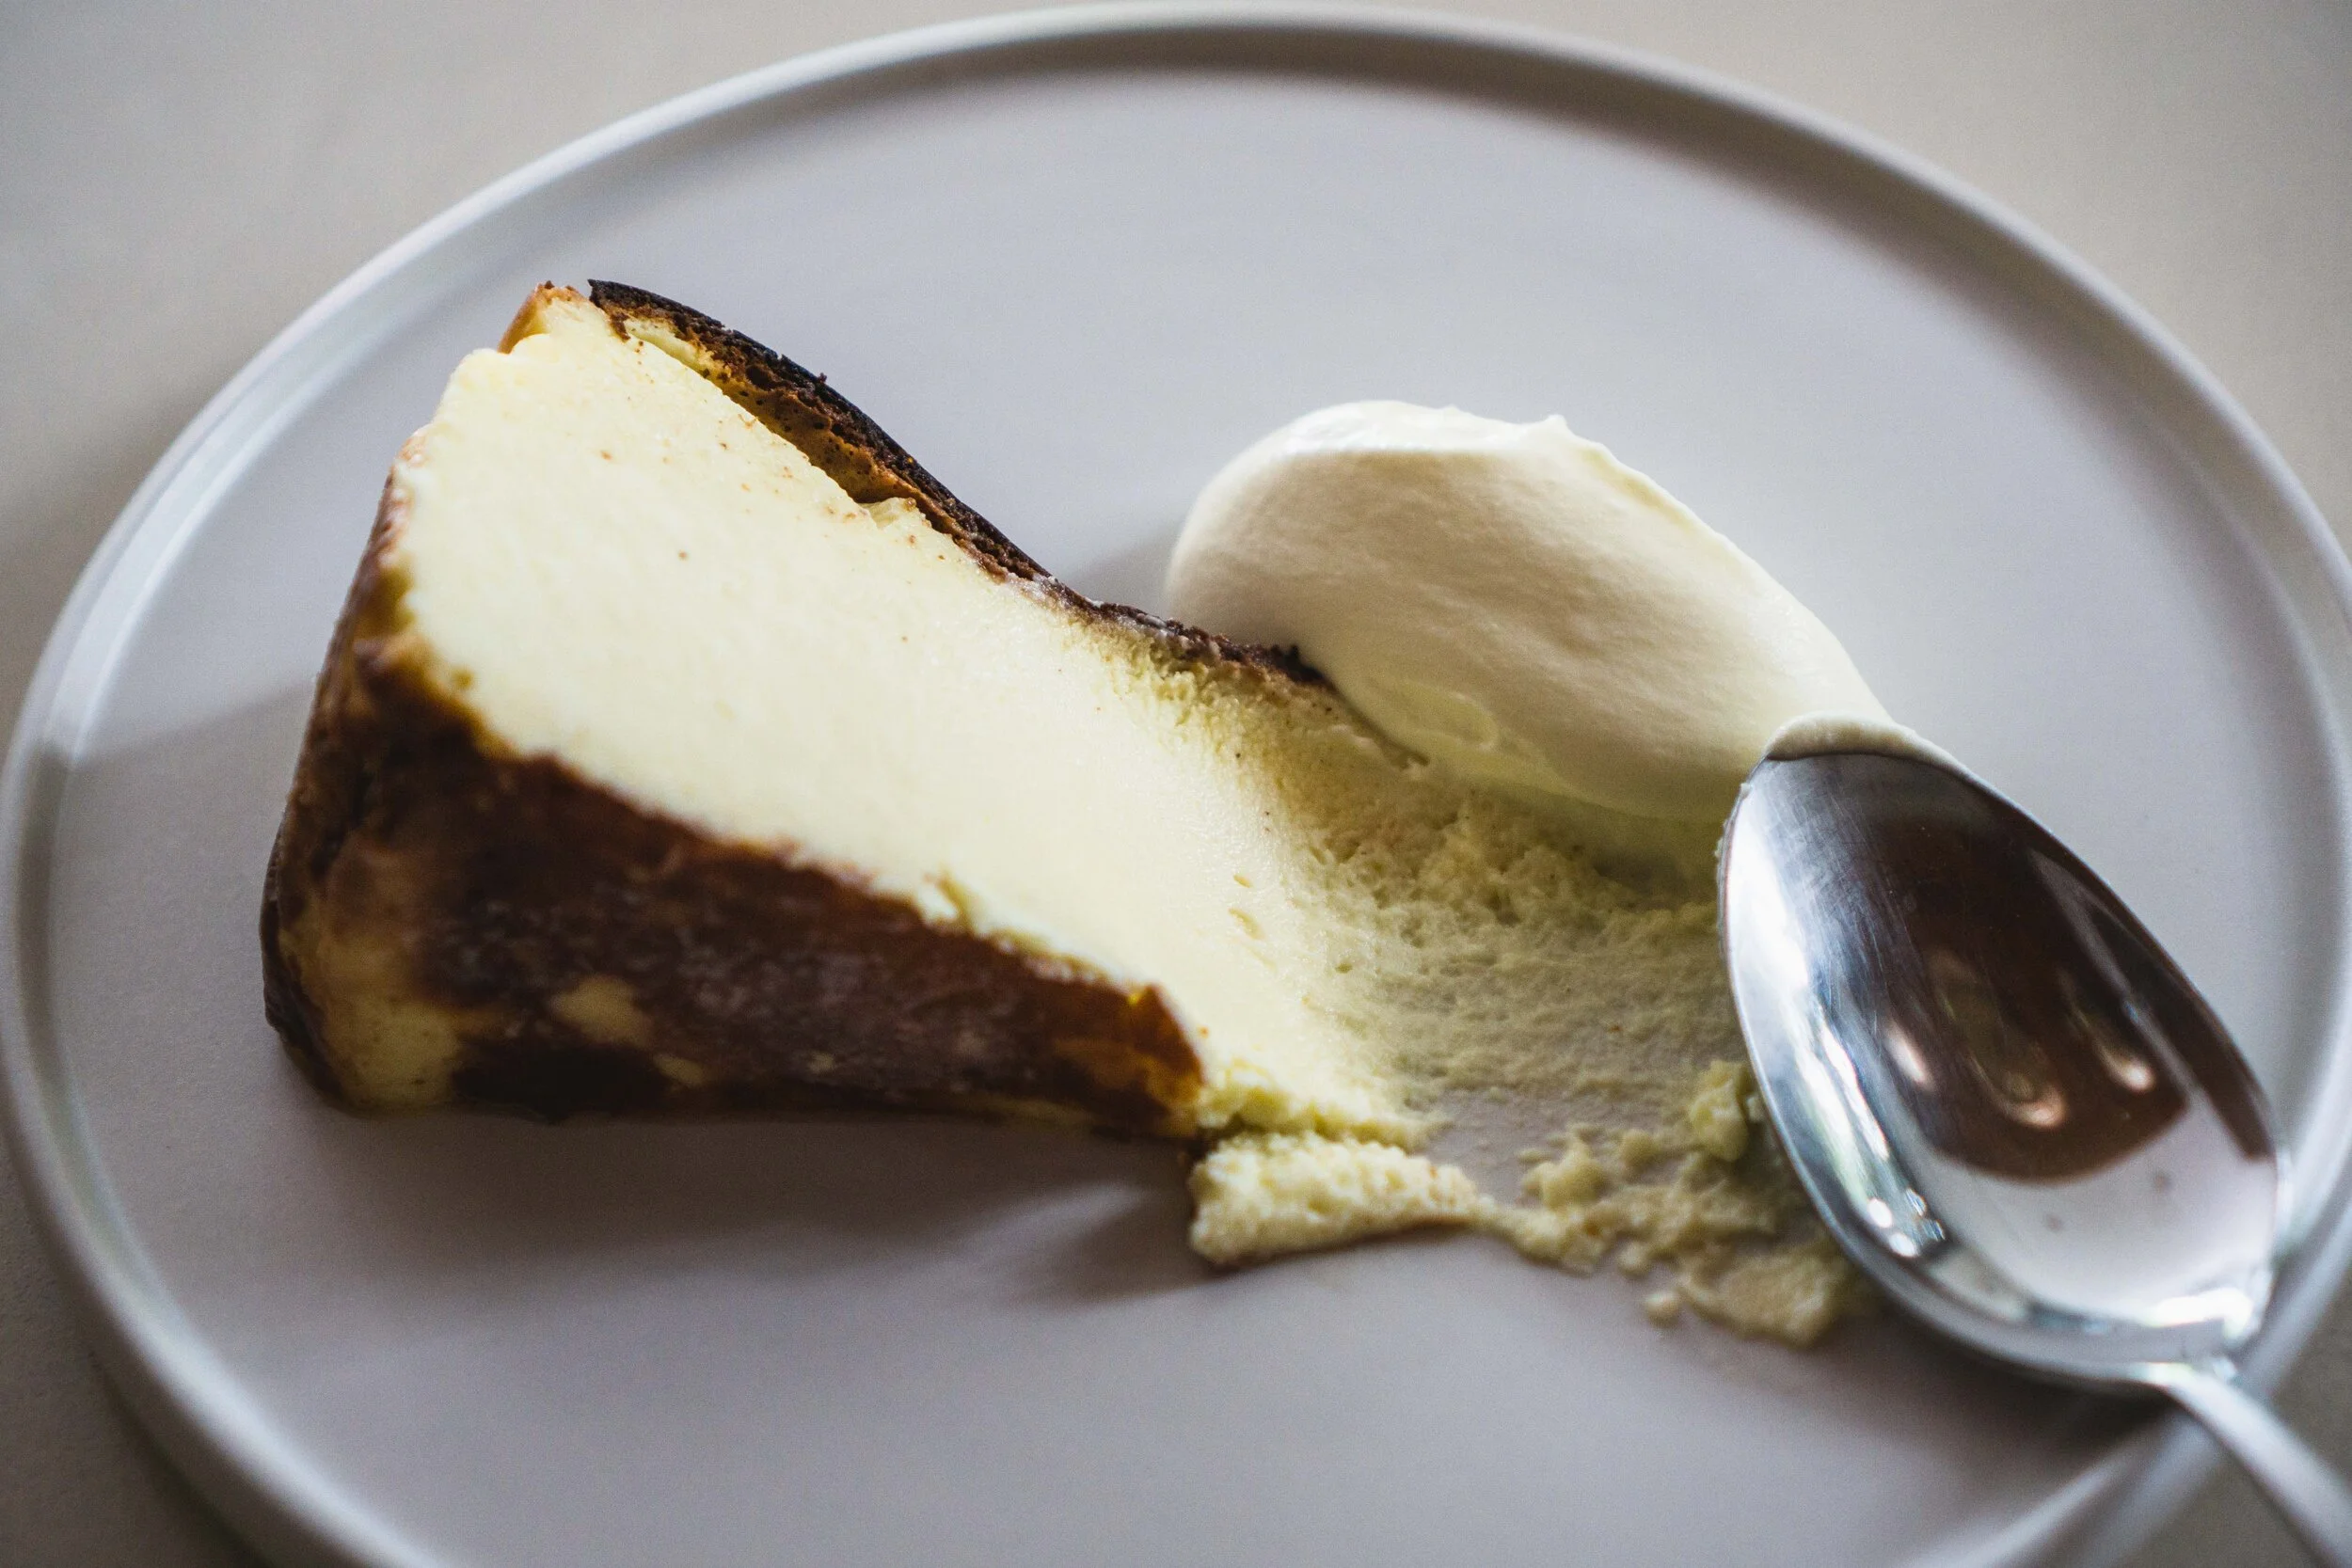
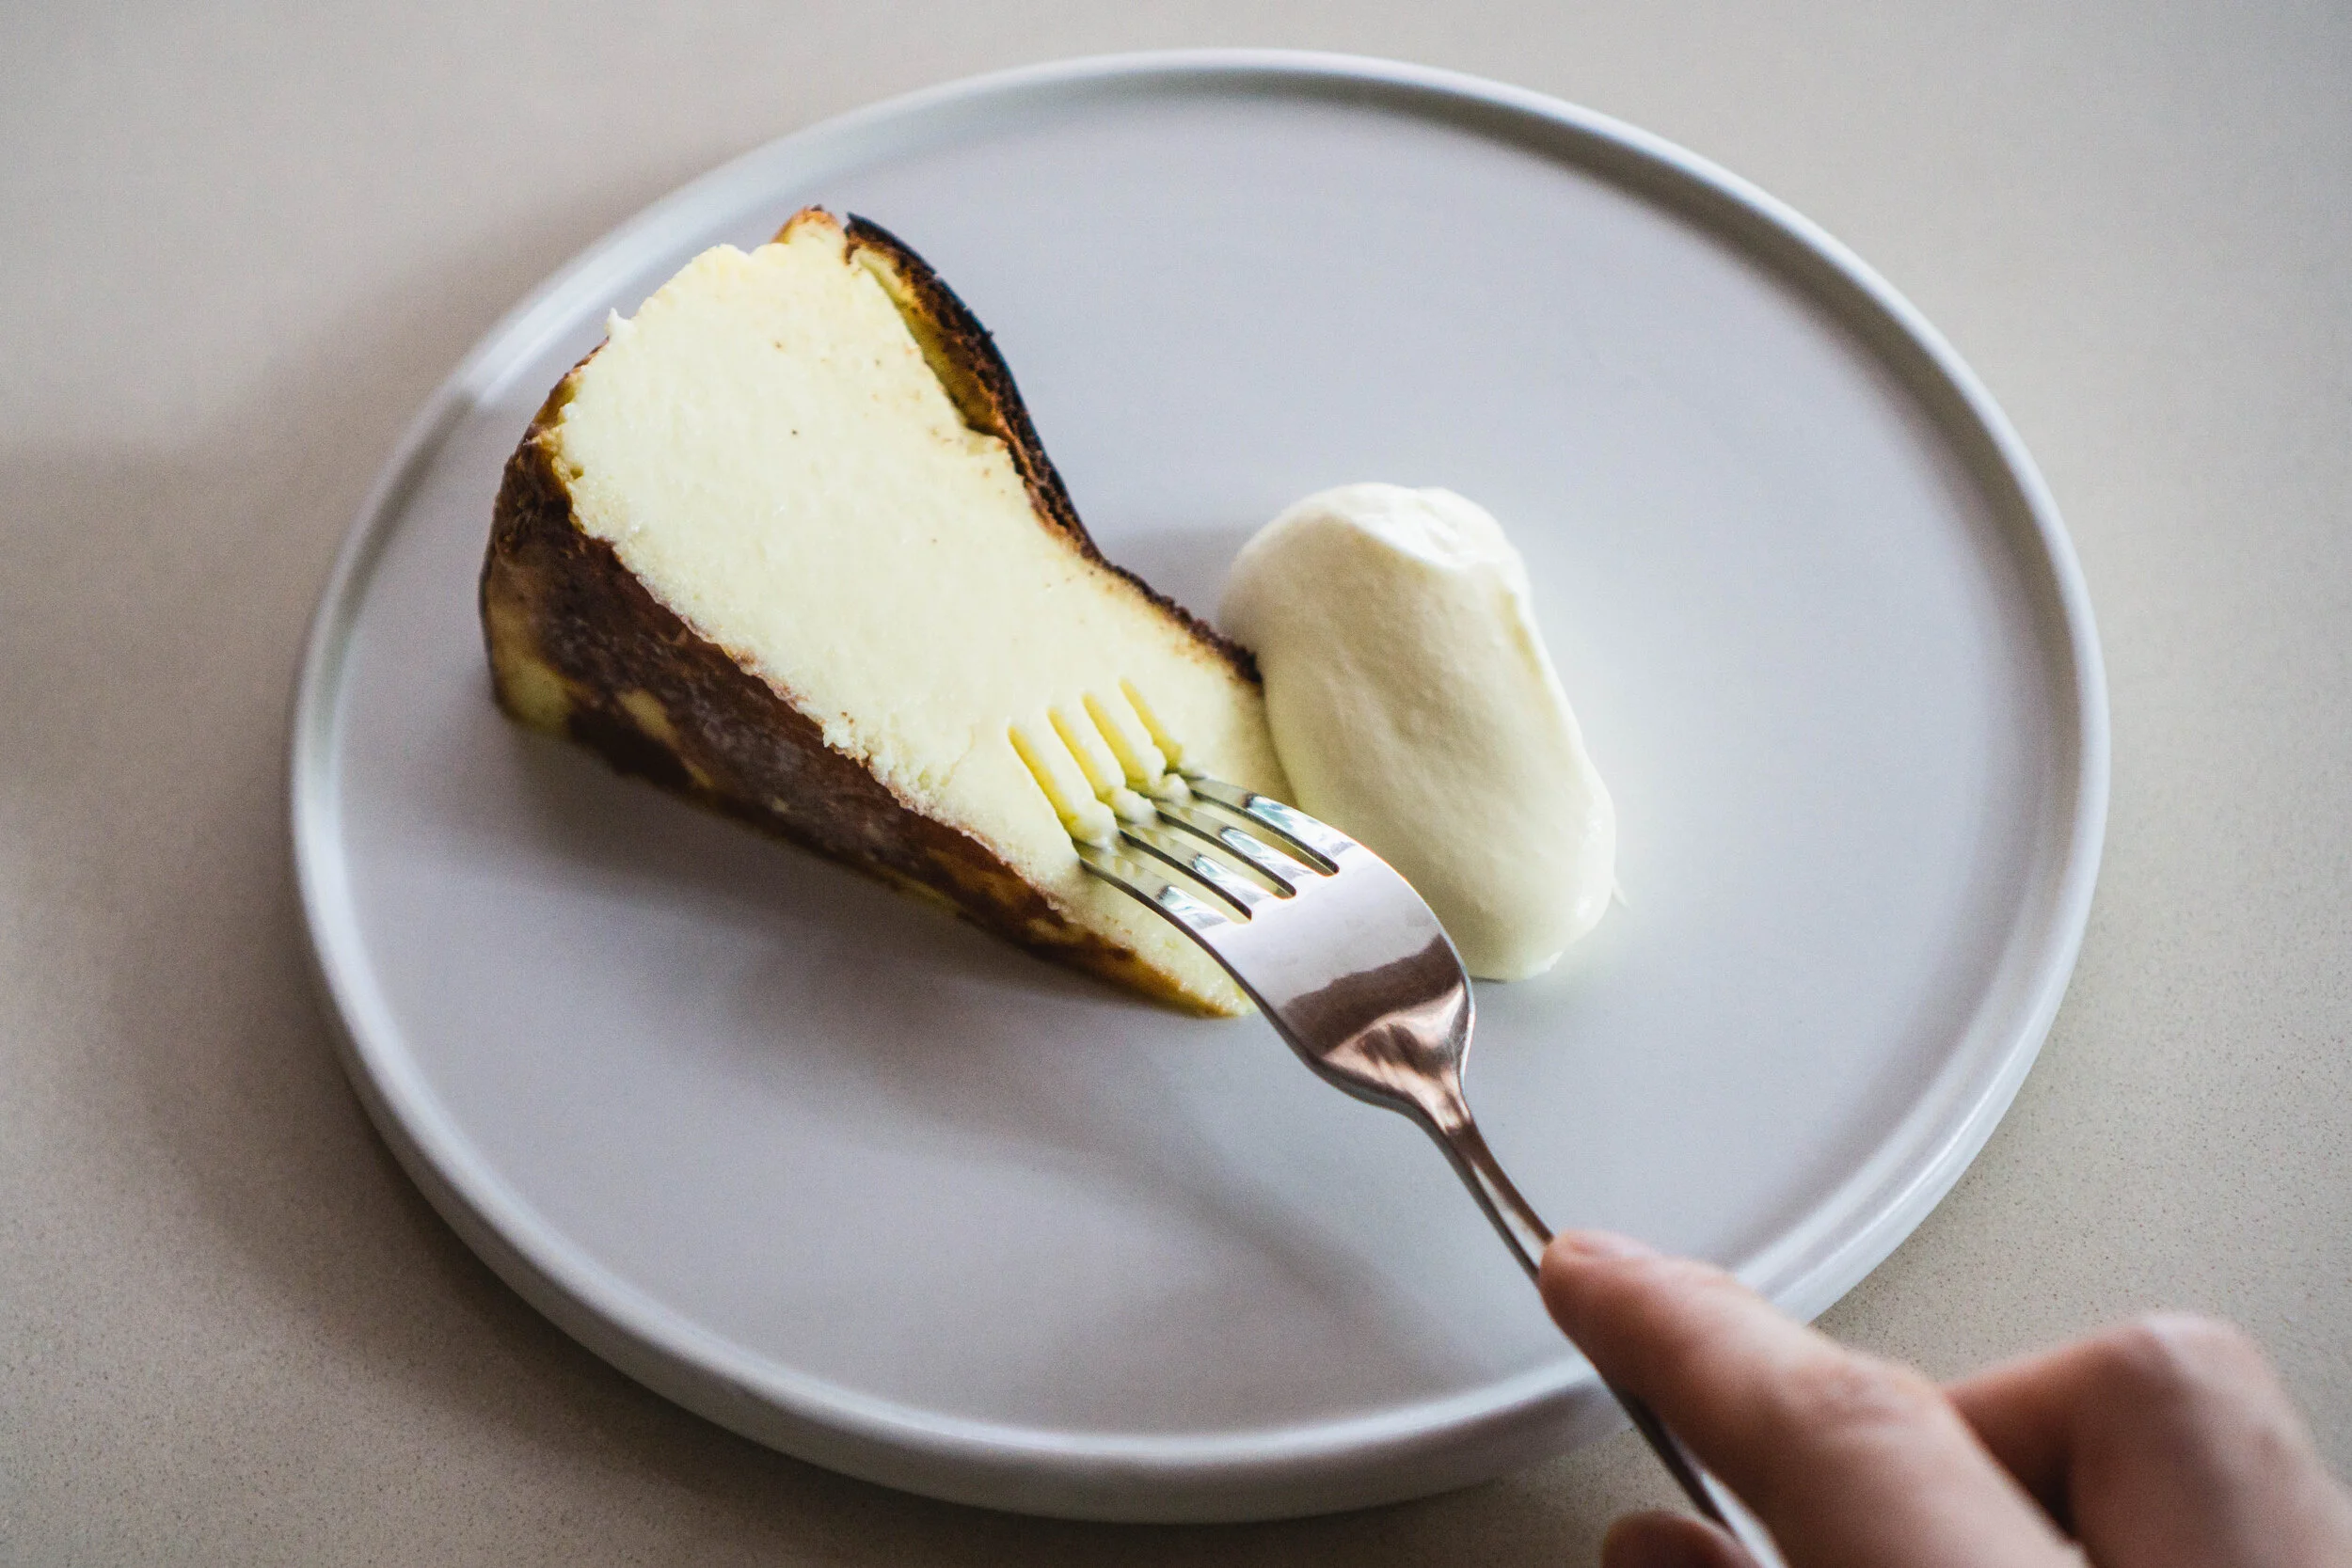
But besides the ingredients, the second big challenge in perfecting this burnt cheesecake is from the baking itself. While in my old recipe I recommended a 200°C, after several rounds of testing, I found that a higher temperature, quicker bake, resulted in a better cake. So I upped the temperature to 250°C, finessed the cooking time, and with some level of oven anxiety, this cake turned out to be so silky and smoosh-able, with a center that’s barely held together. Exactly what I was looking for!
So I’m mighty proud of this one.
Plus, here are three final tips for burnt cheesecake brilliance:
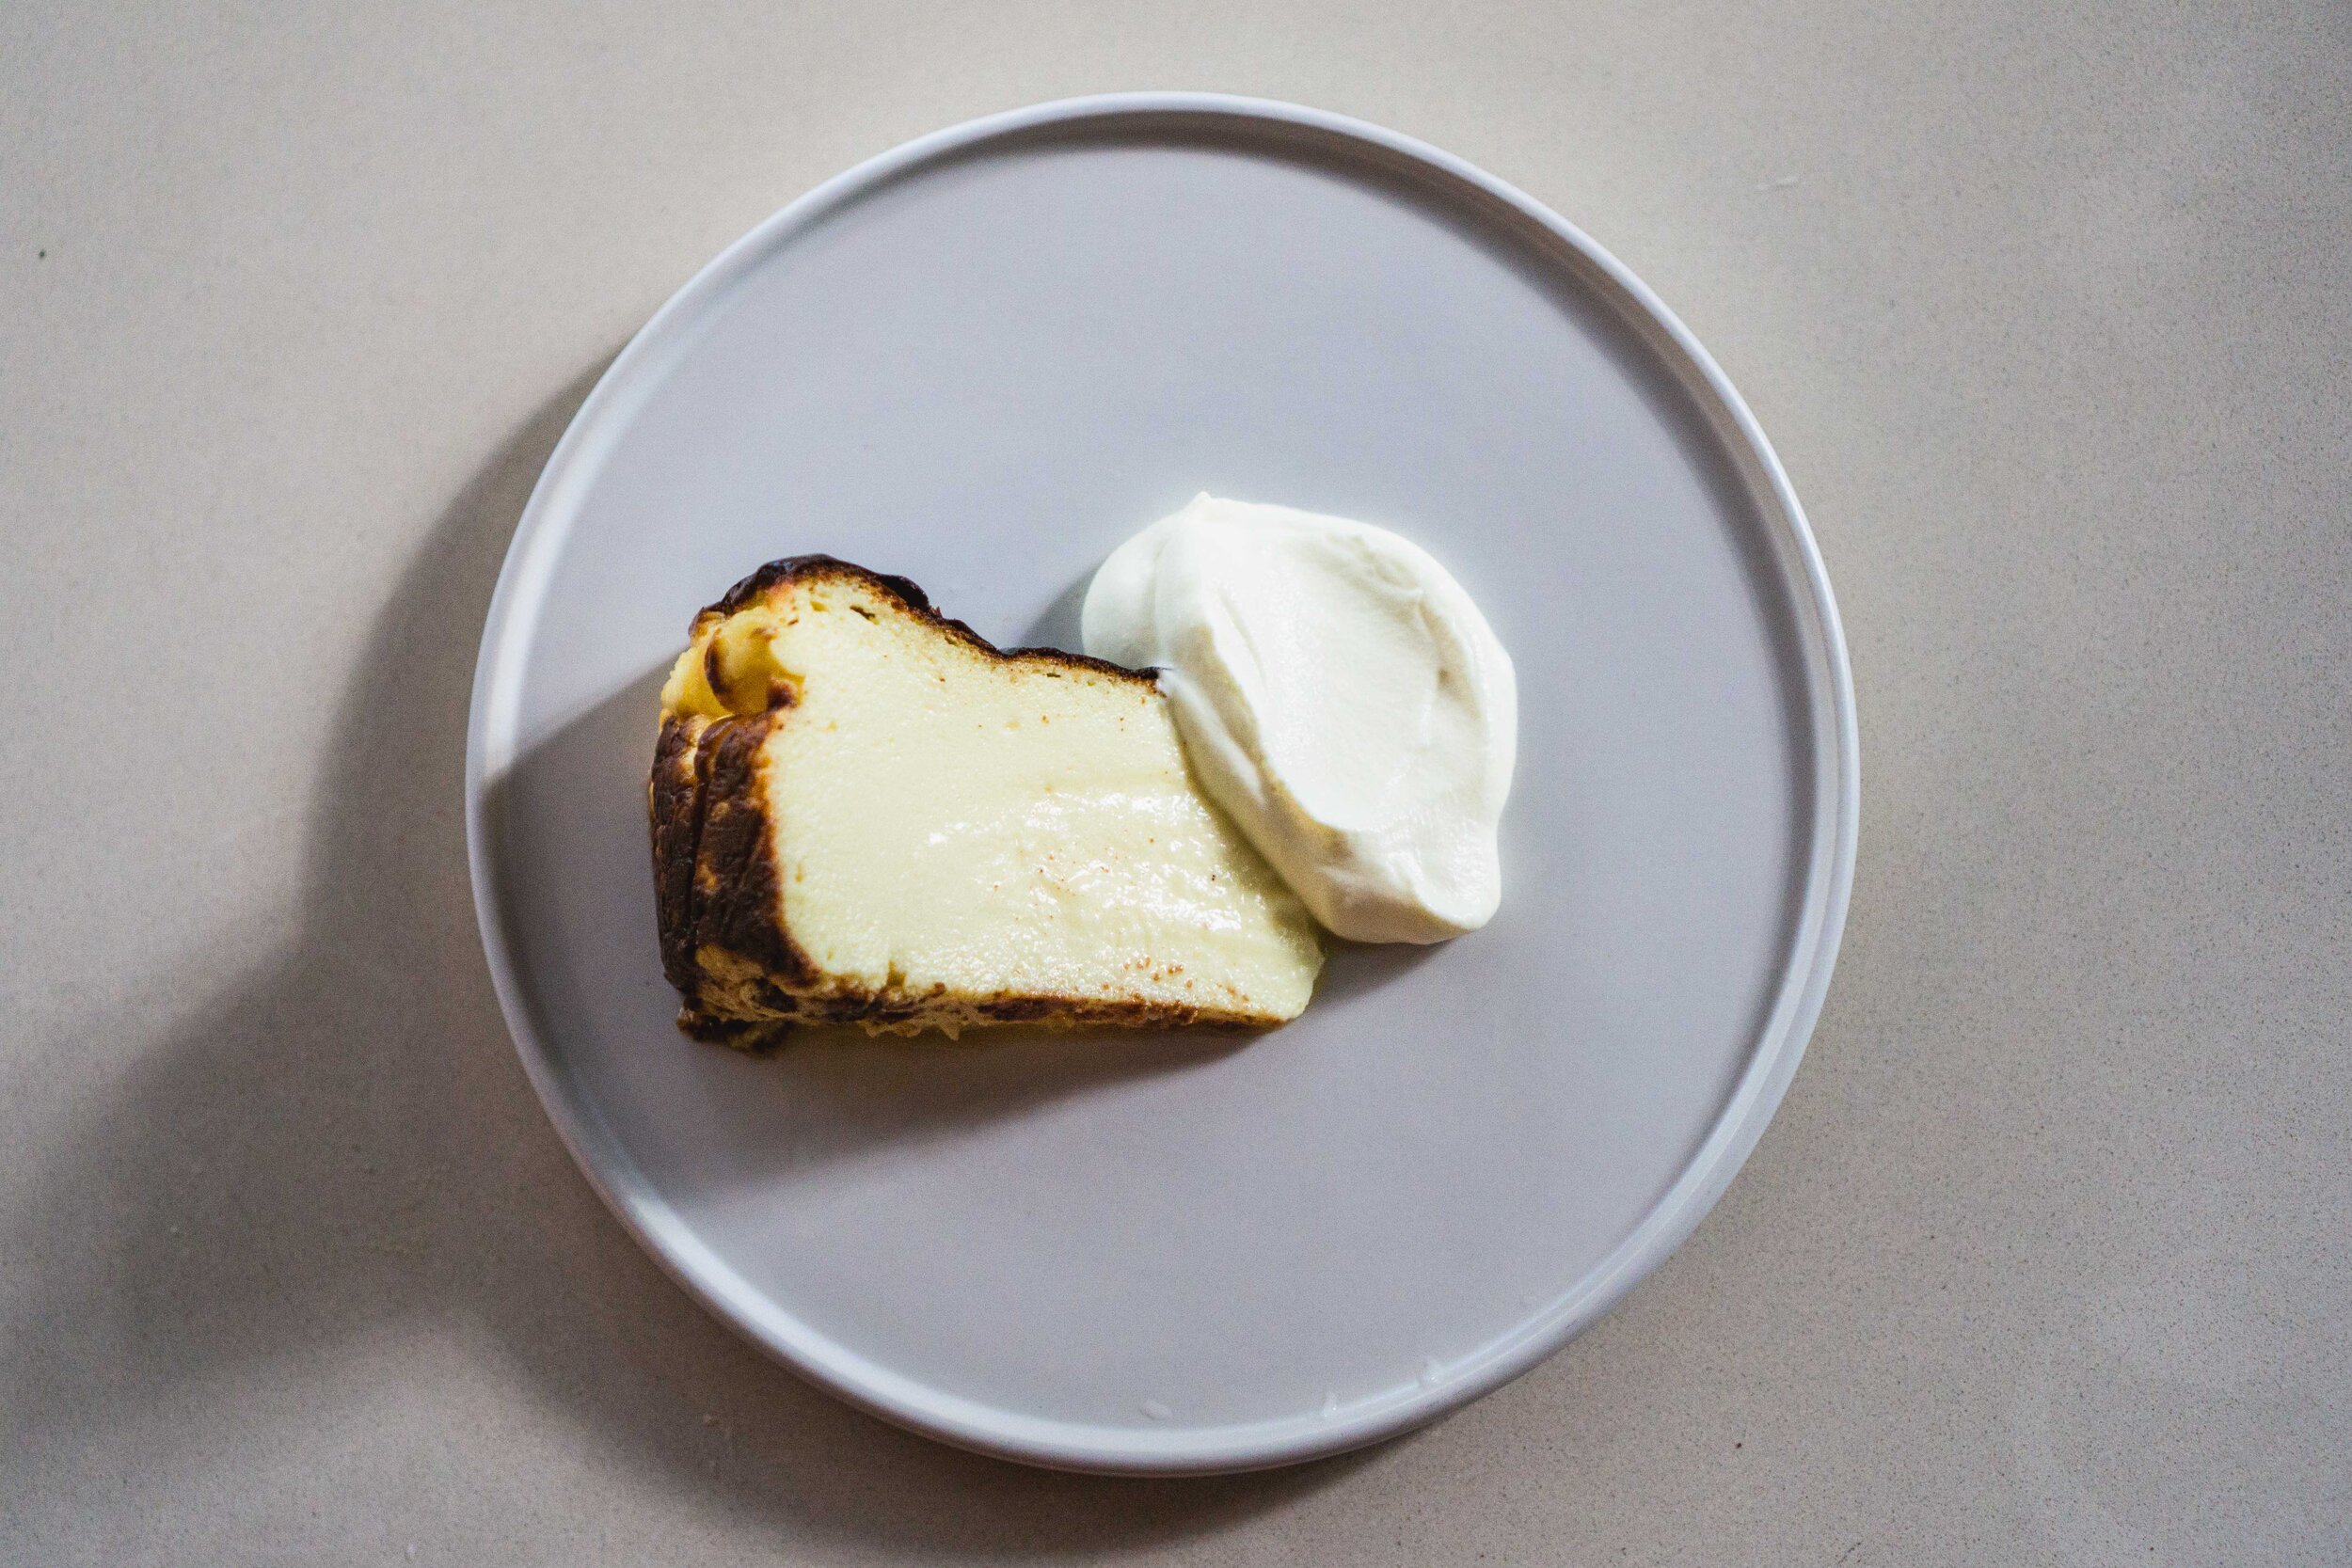
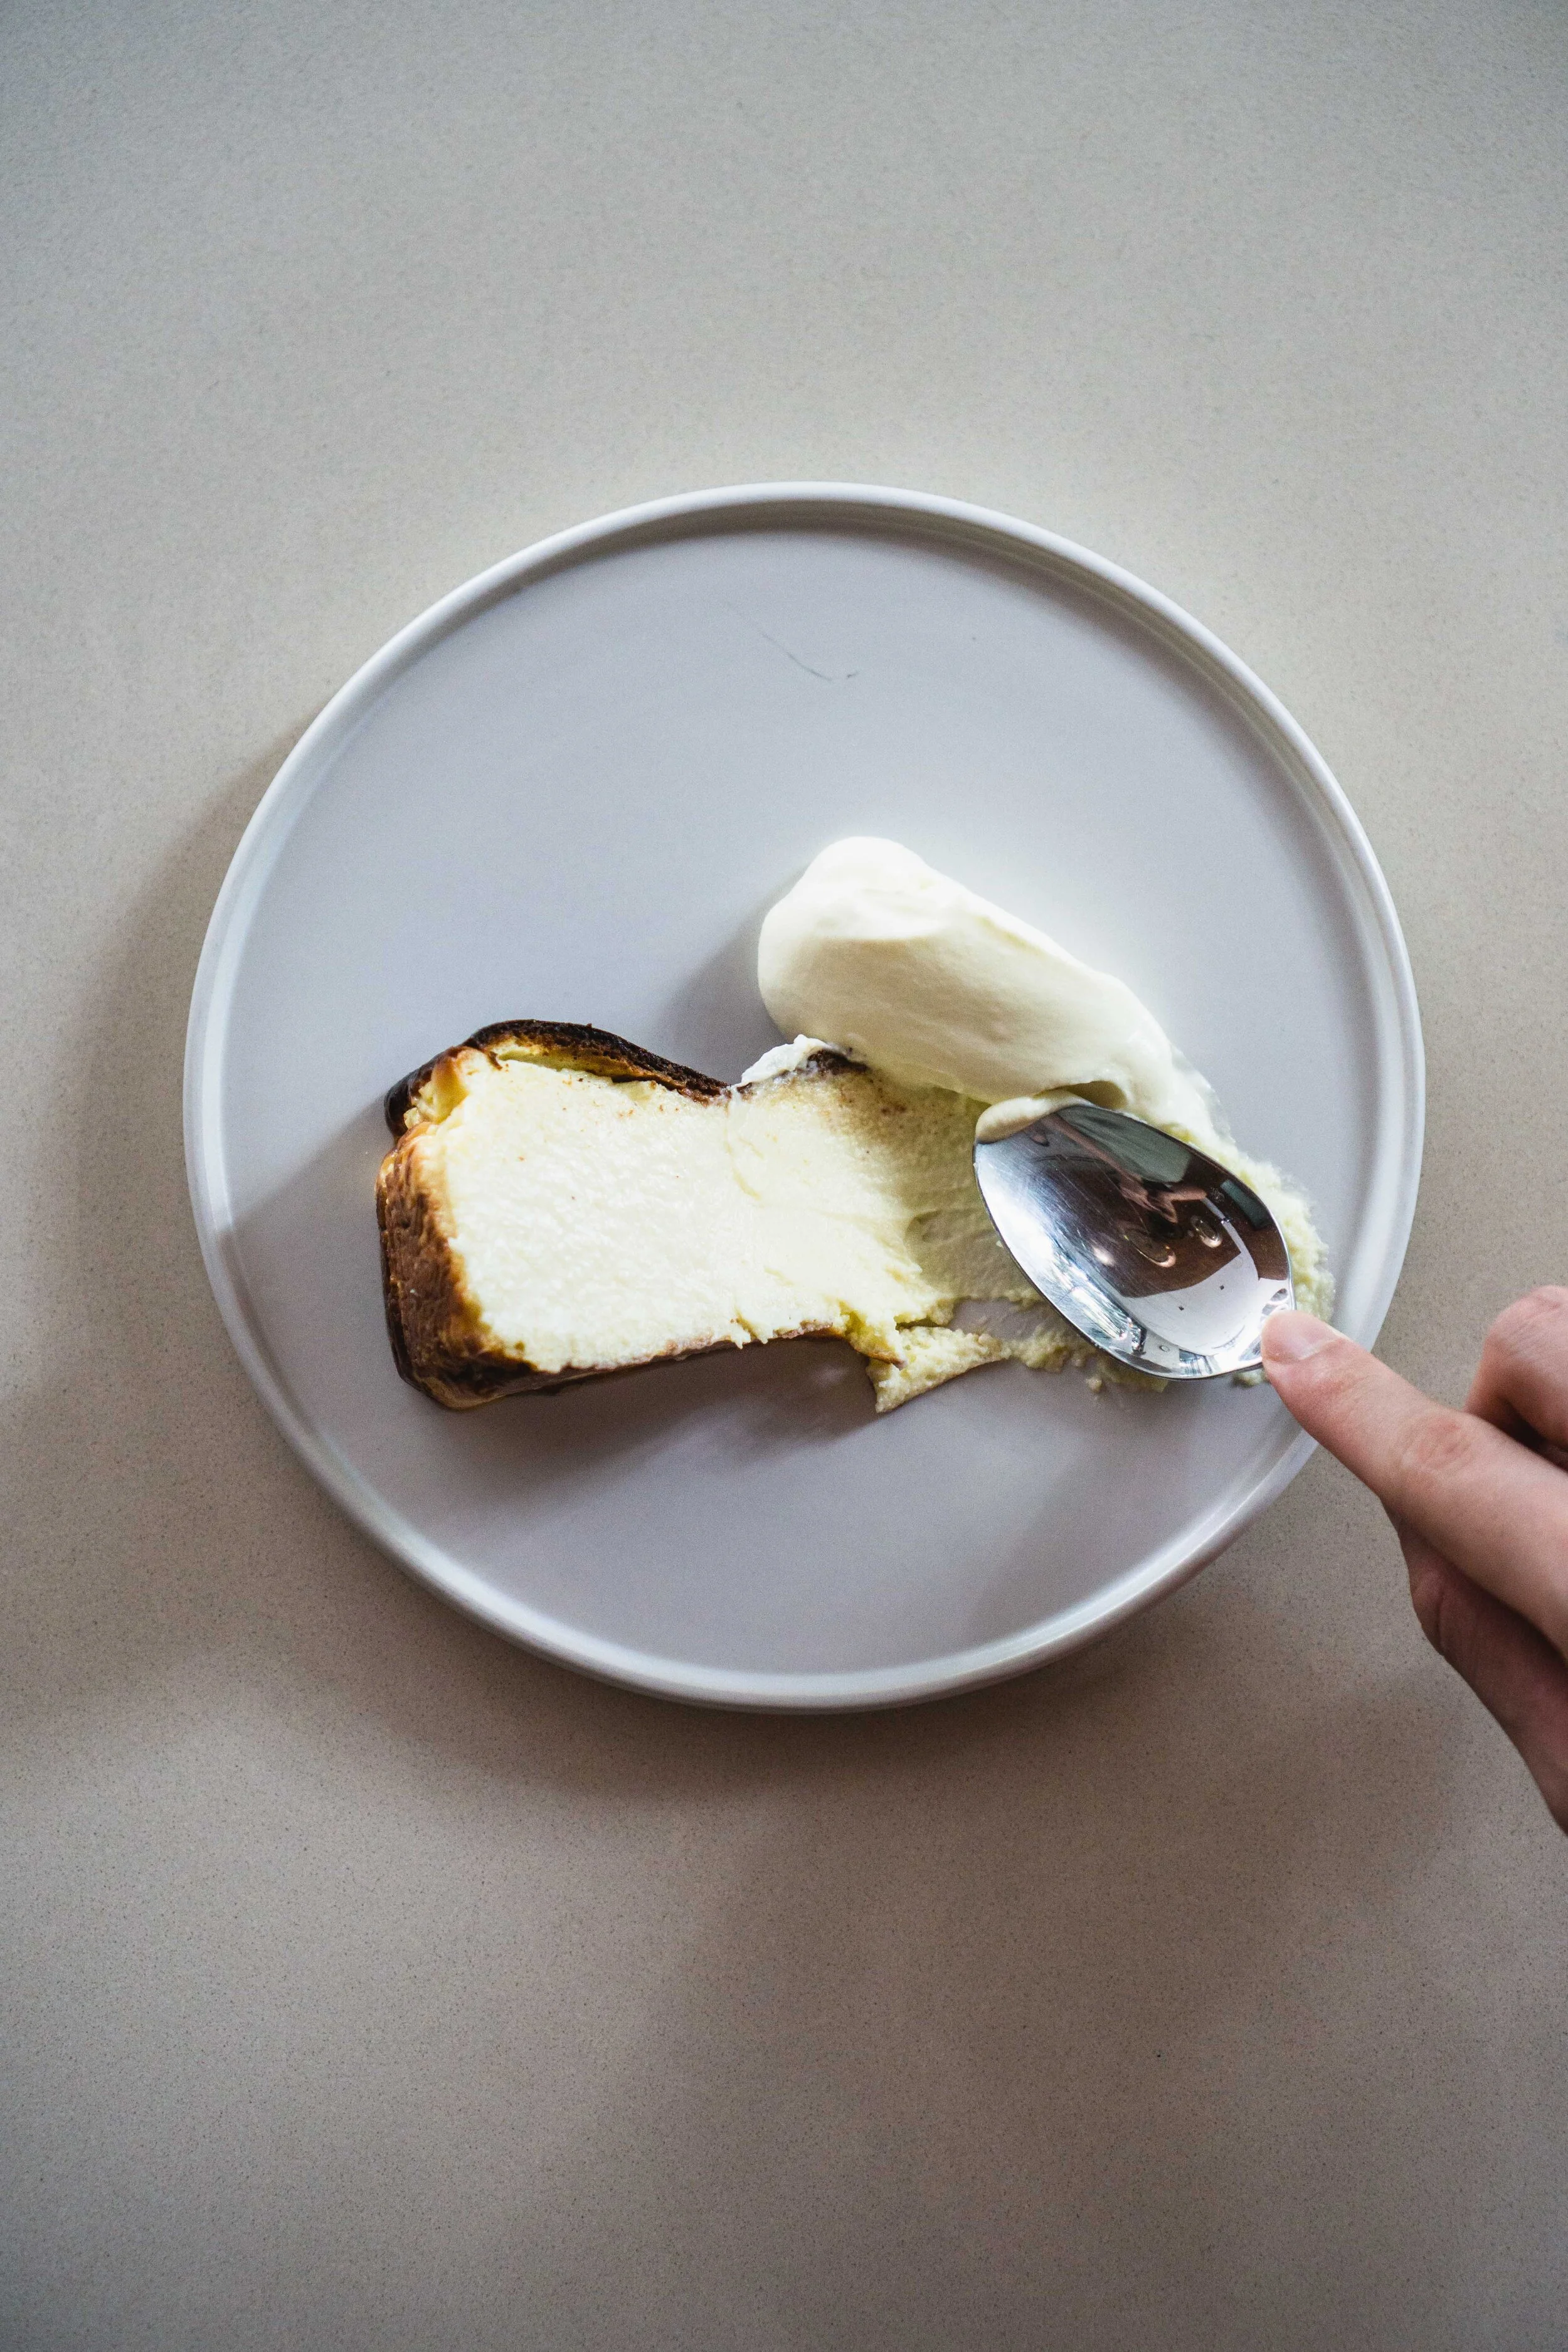
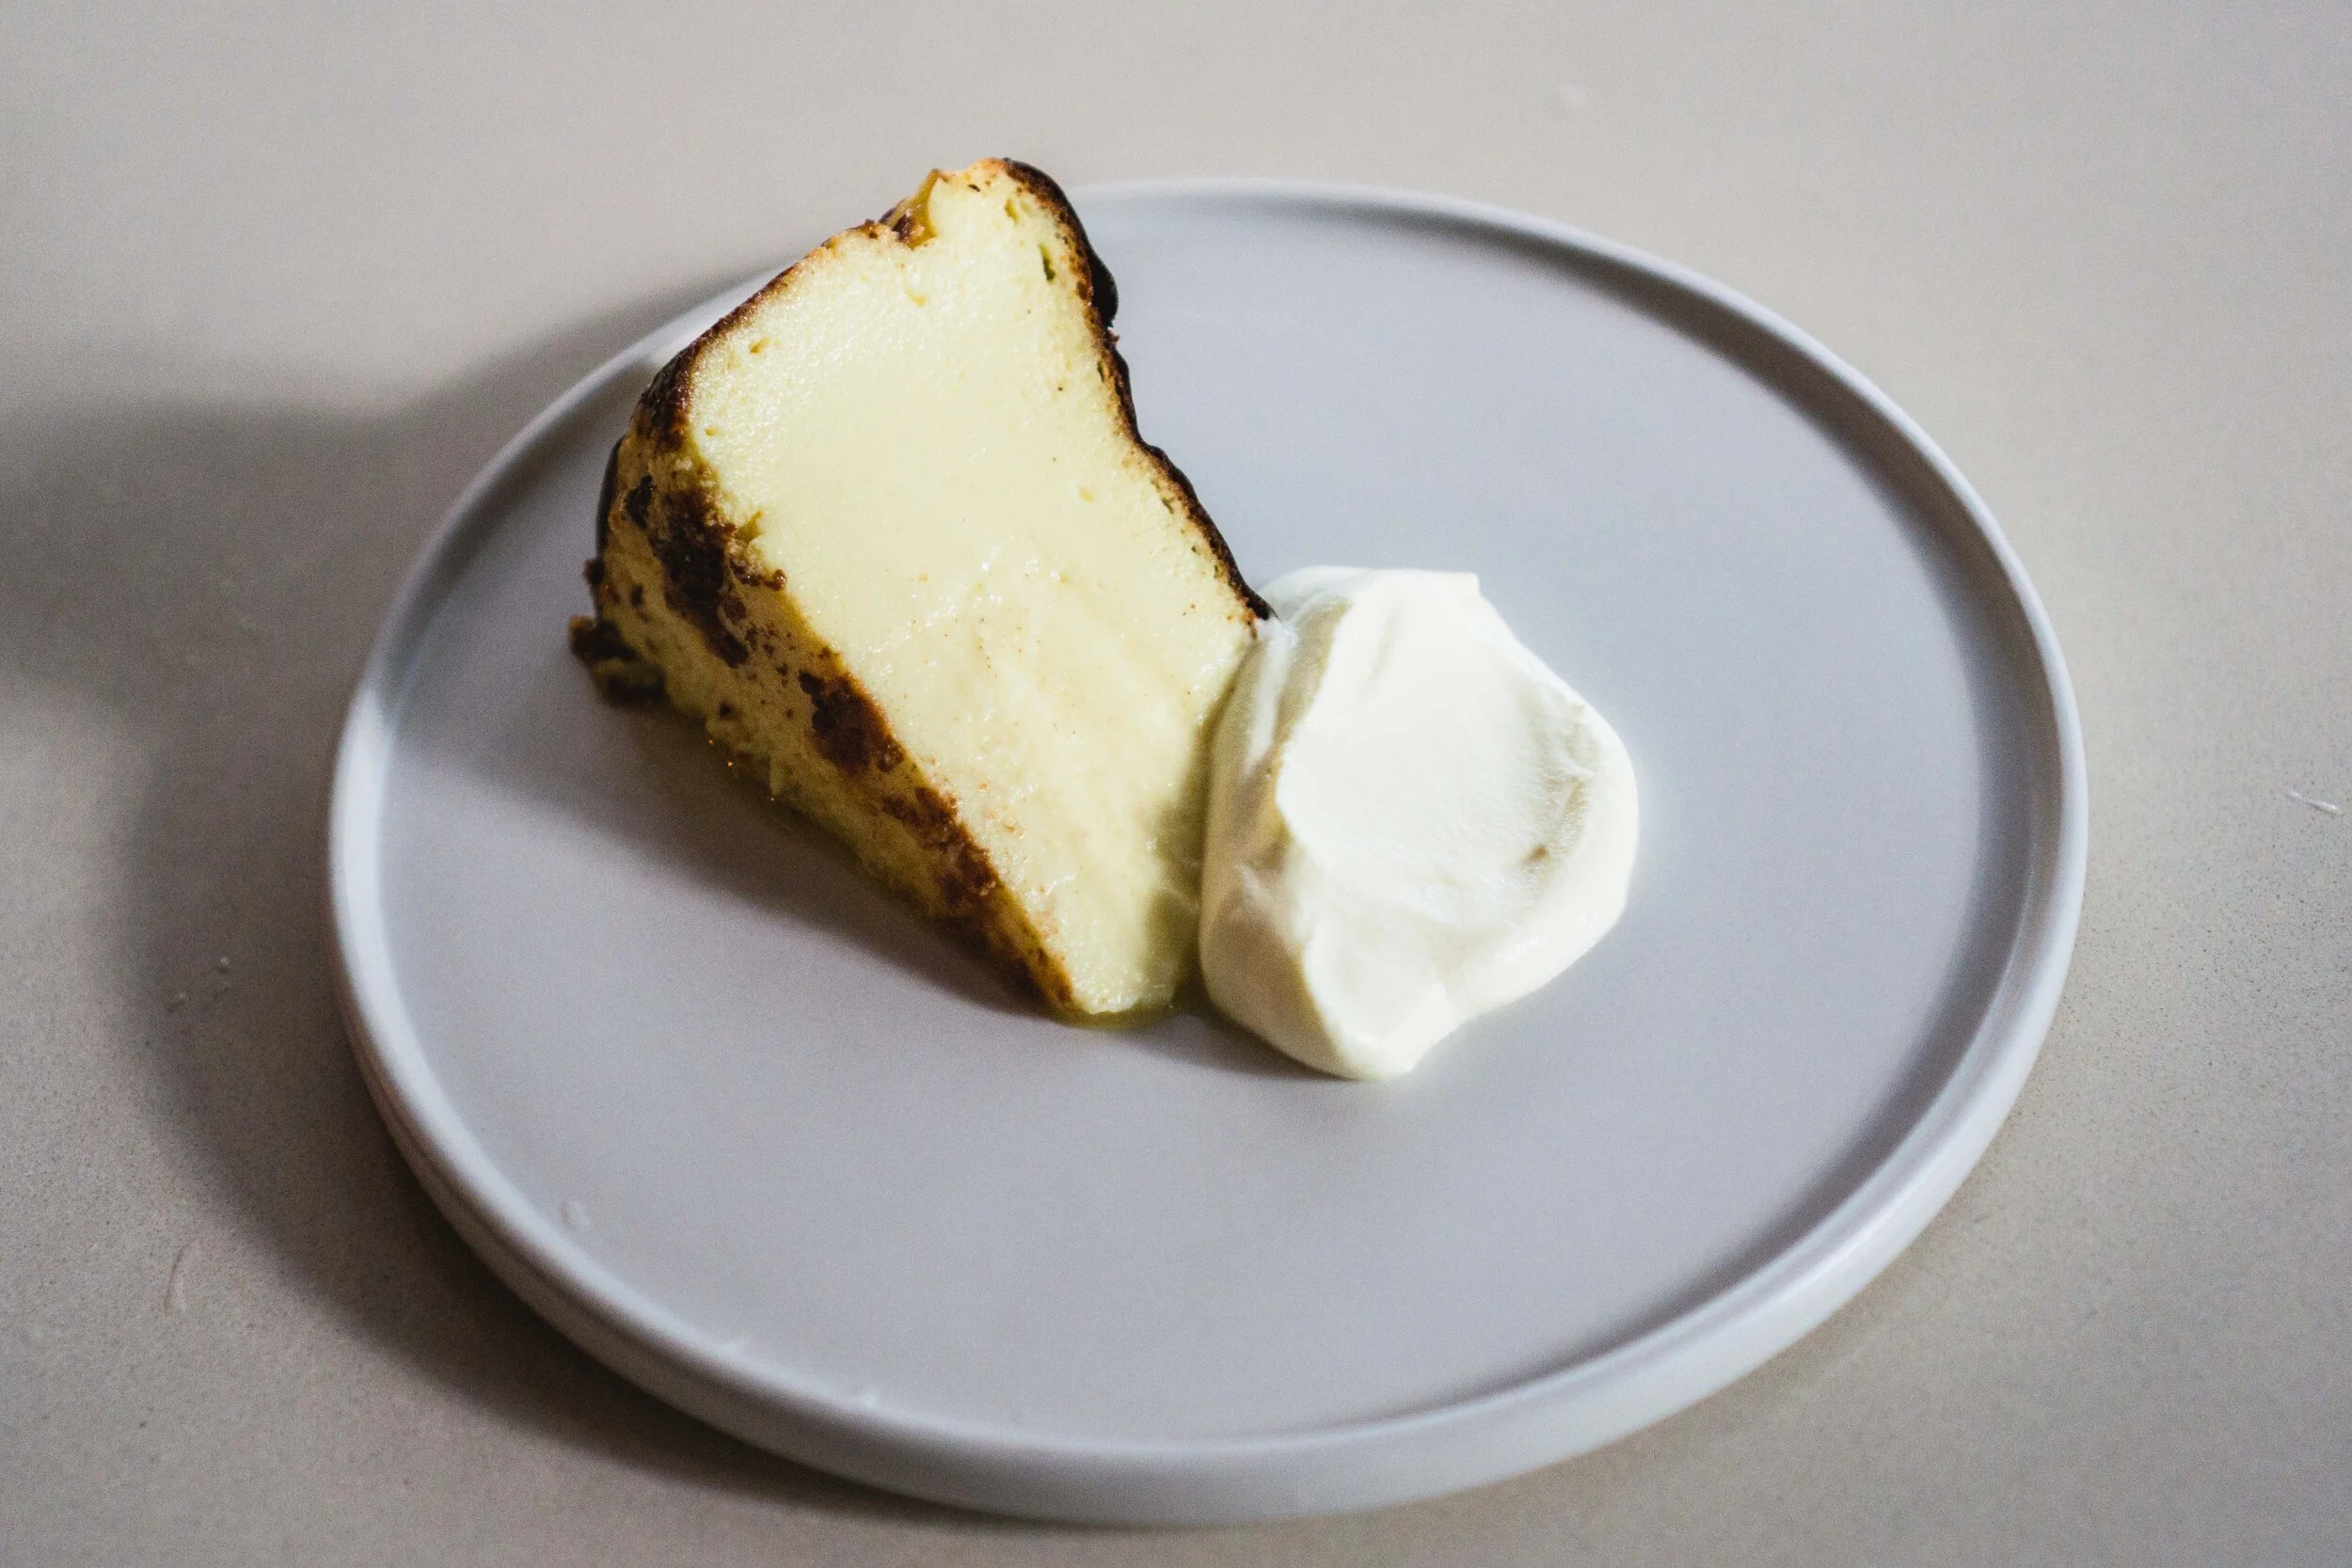
A cake can look burnt but still taste friggin perfect. (And trust me, it’s the lighting that’s making it look extra dark.)
For that custardy, barely-holding-together center, take the cake out of the oven about 3 minutes before you think its actually ready. This sounds so subjective, but when you think the thought “hmm I think it needs another 3 minutes” (which you will), take the cake out. Warning: if you do this when you think the thought “hmm I think it can go for another 5 minutes” and take it out then, your cake will probably be underdone. (Haha I suspect I just caused even more confusion with that comment. Ah well, you’ll know it when you get to it!)
It’s best to let the cake fully chill in the refrigerator. I made the mistake of cutting into the cake a little too soon and it was still a liiiitle too gooey in the middle. (Not a bad thing, just a different feel!) But a 3-hour chill later, it was just perfect.


Burnt Cheesecake
makes one 8-inch cake (or halve the recipe for a 6-inch cake)
Ingredients
1kg cream cheese
280g caster sugar
1 teaspoon (5g) salt
7 eggs
1 teaspoon vanilla extract
1 tablespoon (15ml) lemon juice
400ml heavy cream, or whipping cream
10g all-purpose flour
Directions
Beat the cream cheese, sugar, and salt together in a stand mixer on medium for 2-3 minutes, until smooth and silky. Then, add the eggs one by one while the mixer is on low, and let it incorporate. Scrape the sides and bottom of the bowl to make sure everything is evenly mixed. Then, add the vanilla, lemon juice, and heavy cream. (Make sure not to measure the lemon juice and cream together, otherwise the cream would curdle.) Finally, dust the flour through a sieve, into the cake batter, and mix it until there are no lumps.
Heat your oven to 250°C. (I used a convection oven here, but for a static oven, use the same temperature, but rotate the cake every 15 minutes or so, and watch the top carefully so there aren’t any overly burnt spots.) Then, line a 8 or 9-inch cake tin with baking paper, fitting it snugly on the bottom and ruffling it on the sides. Make sure to have at least 2-inches of baking paper sticking out on all sides, as the cake will rise as it bakes.
Pour the cake batter into the lined cake tin. Give it a few gentle taps release any large air bubbles. Then, bake for 35-40 minutes, until the top of the cake is brown and charred at parts, but the center is still noticeably jiggly. (For that super soft, custard-like middle, you’ll need to take it out from the oven just a tad before you think it’s actually ready. Sounds pretty subjective, I know, but you’ll feel that feeling when you get to it. For me this was at the 36 minute mark.)
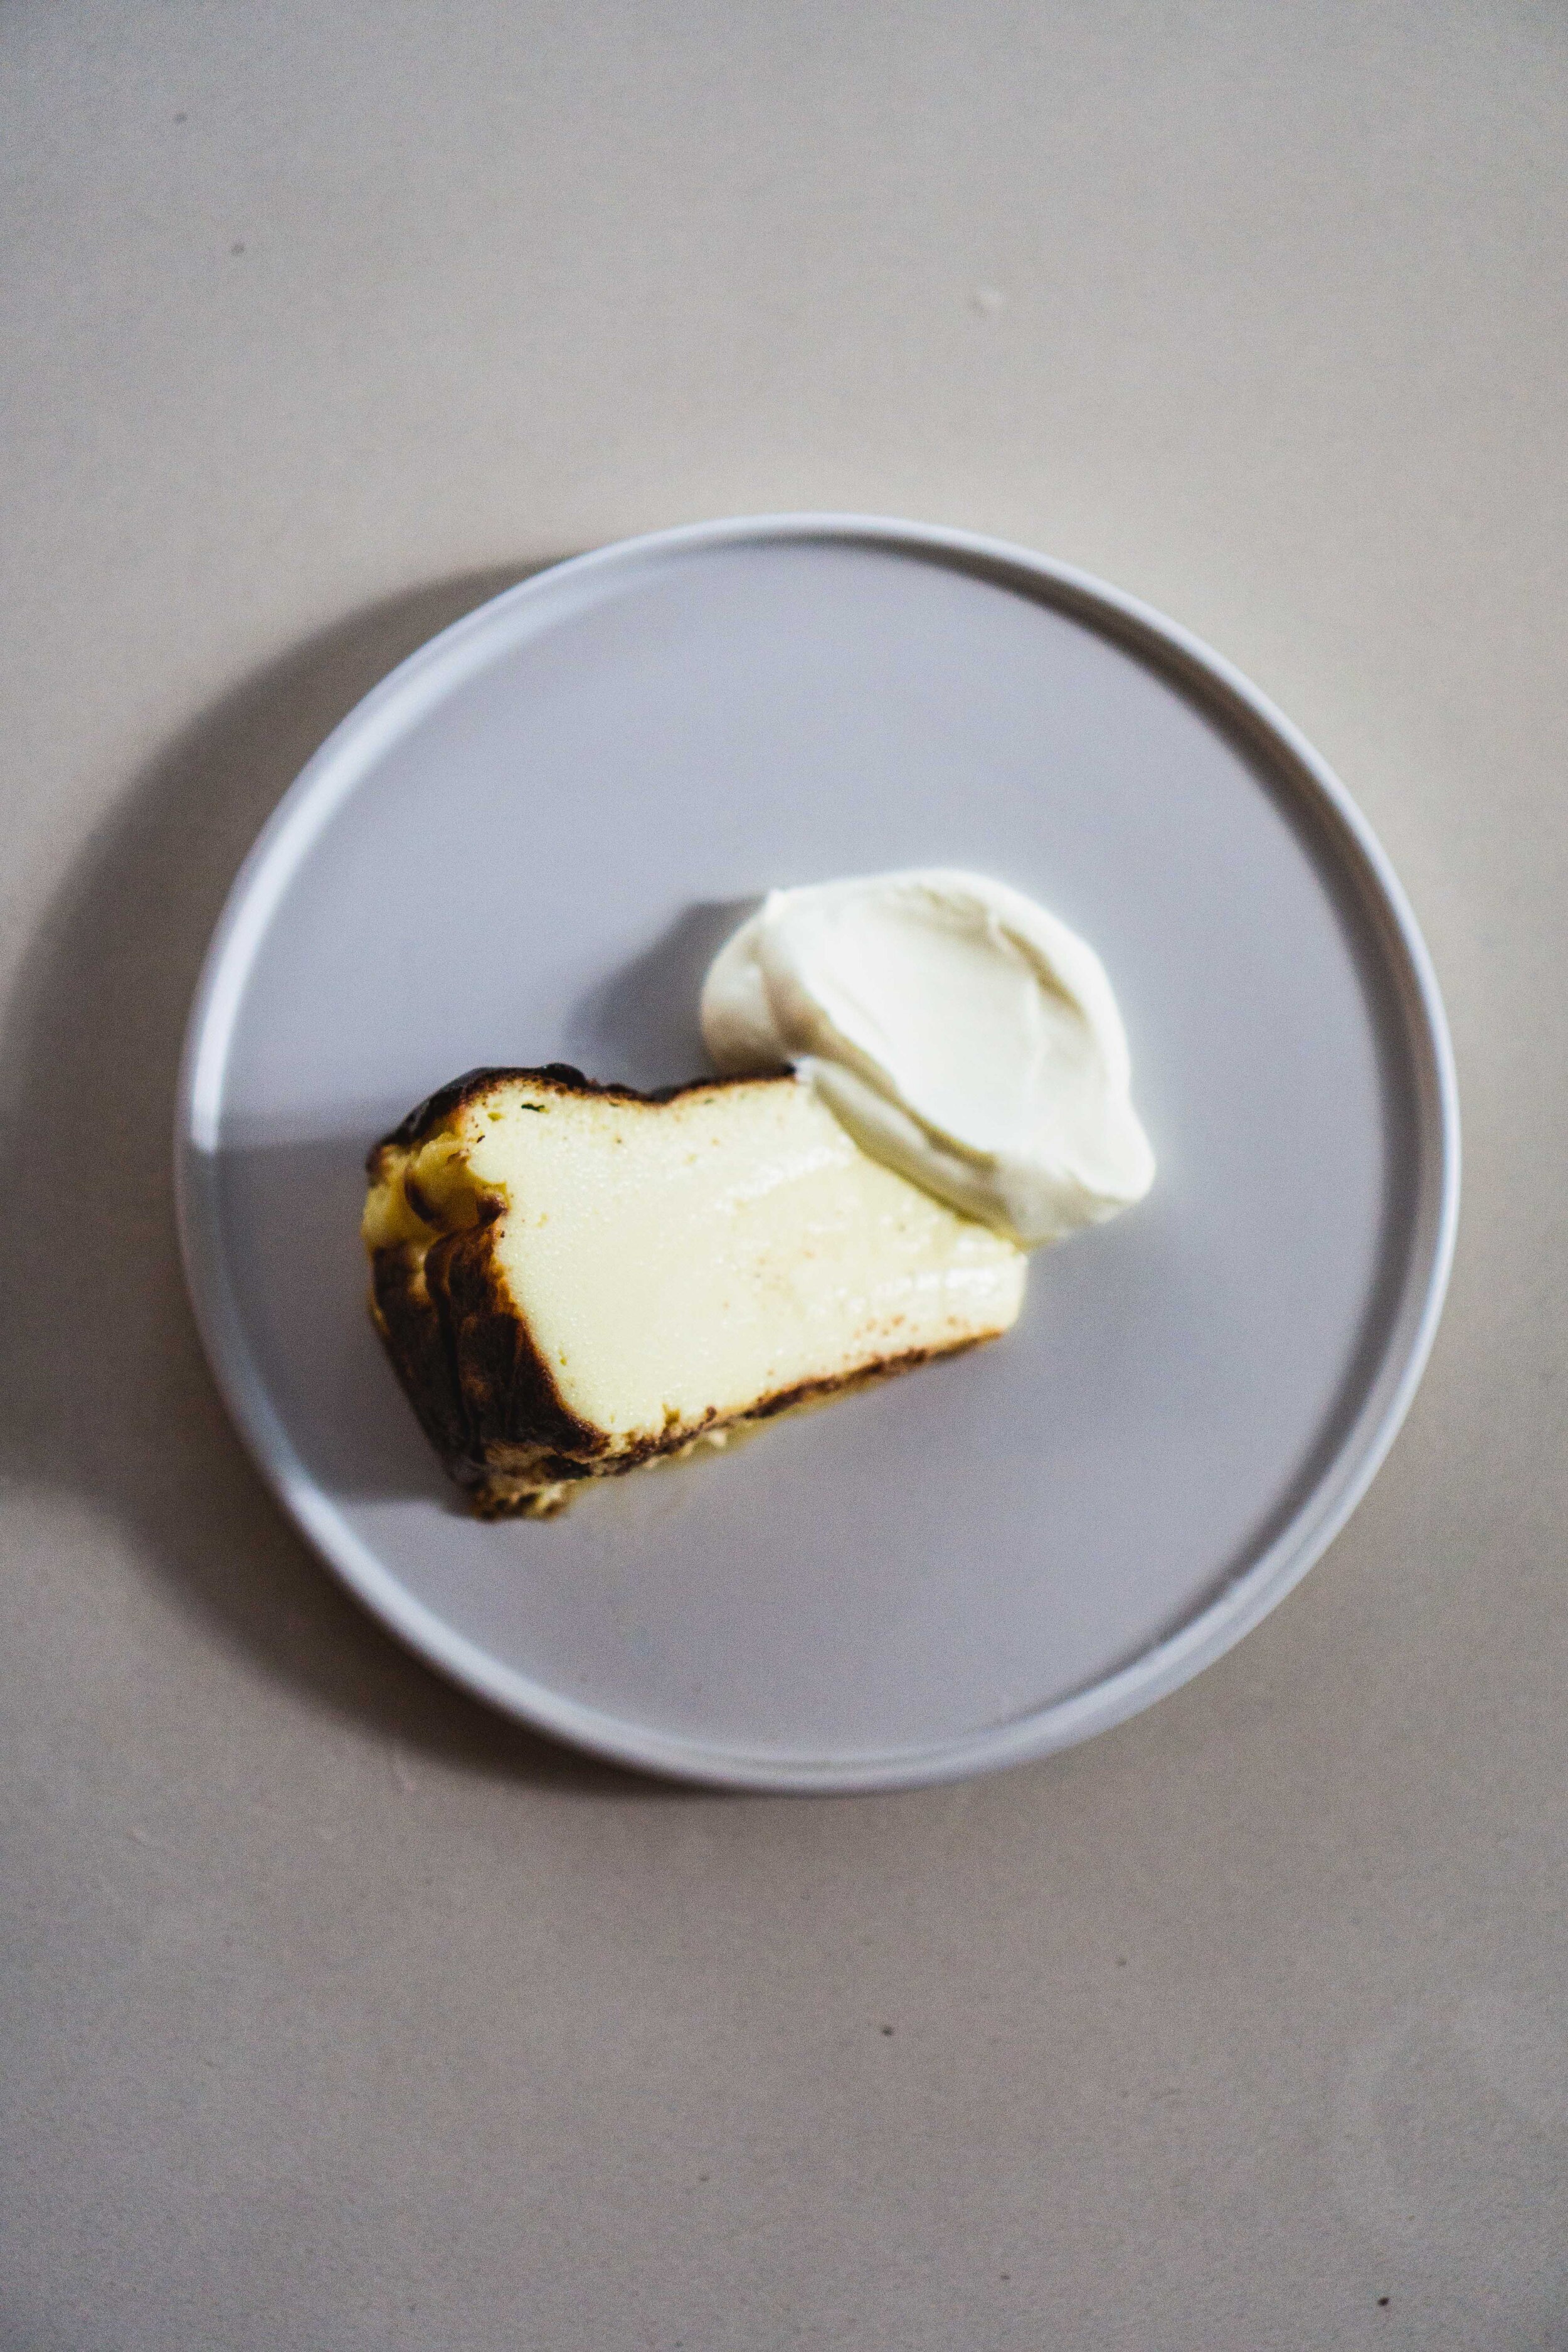
When done baking, let the cake cool in its tin on a wire rack until it reaches room temperature. Then, put it in the refrigerator to cool for at least another 2 hours. After that, remove it from its tin and remove the baking paper, slice it into 8-12 slices, and indulge! You can have it with whipped cream, jam, or just plain. Either way, it’s gorgeously silky, cheesy goodness.