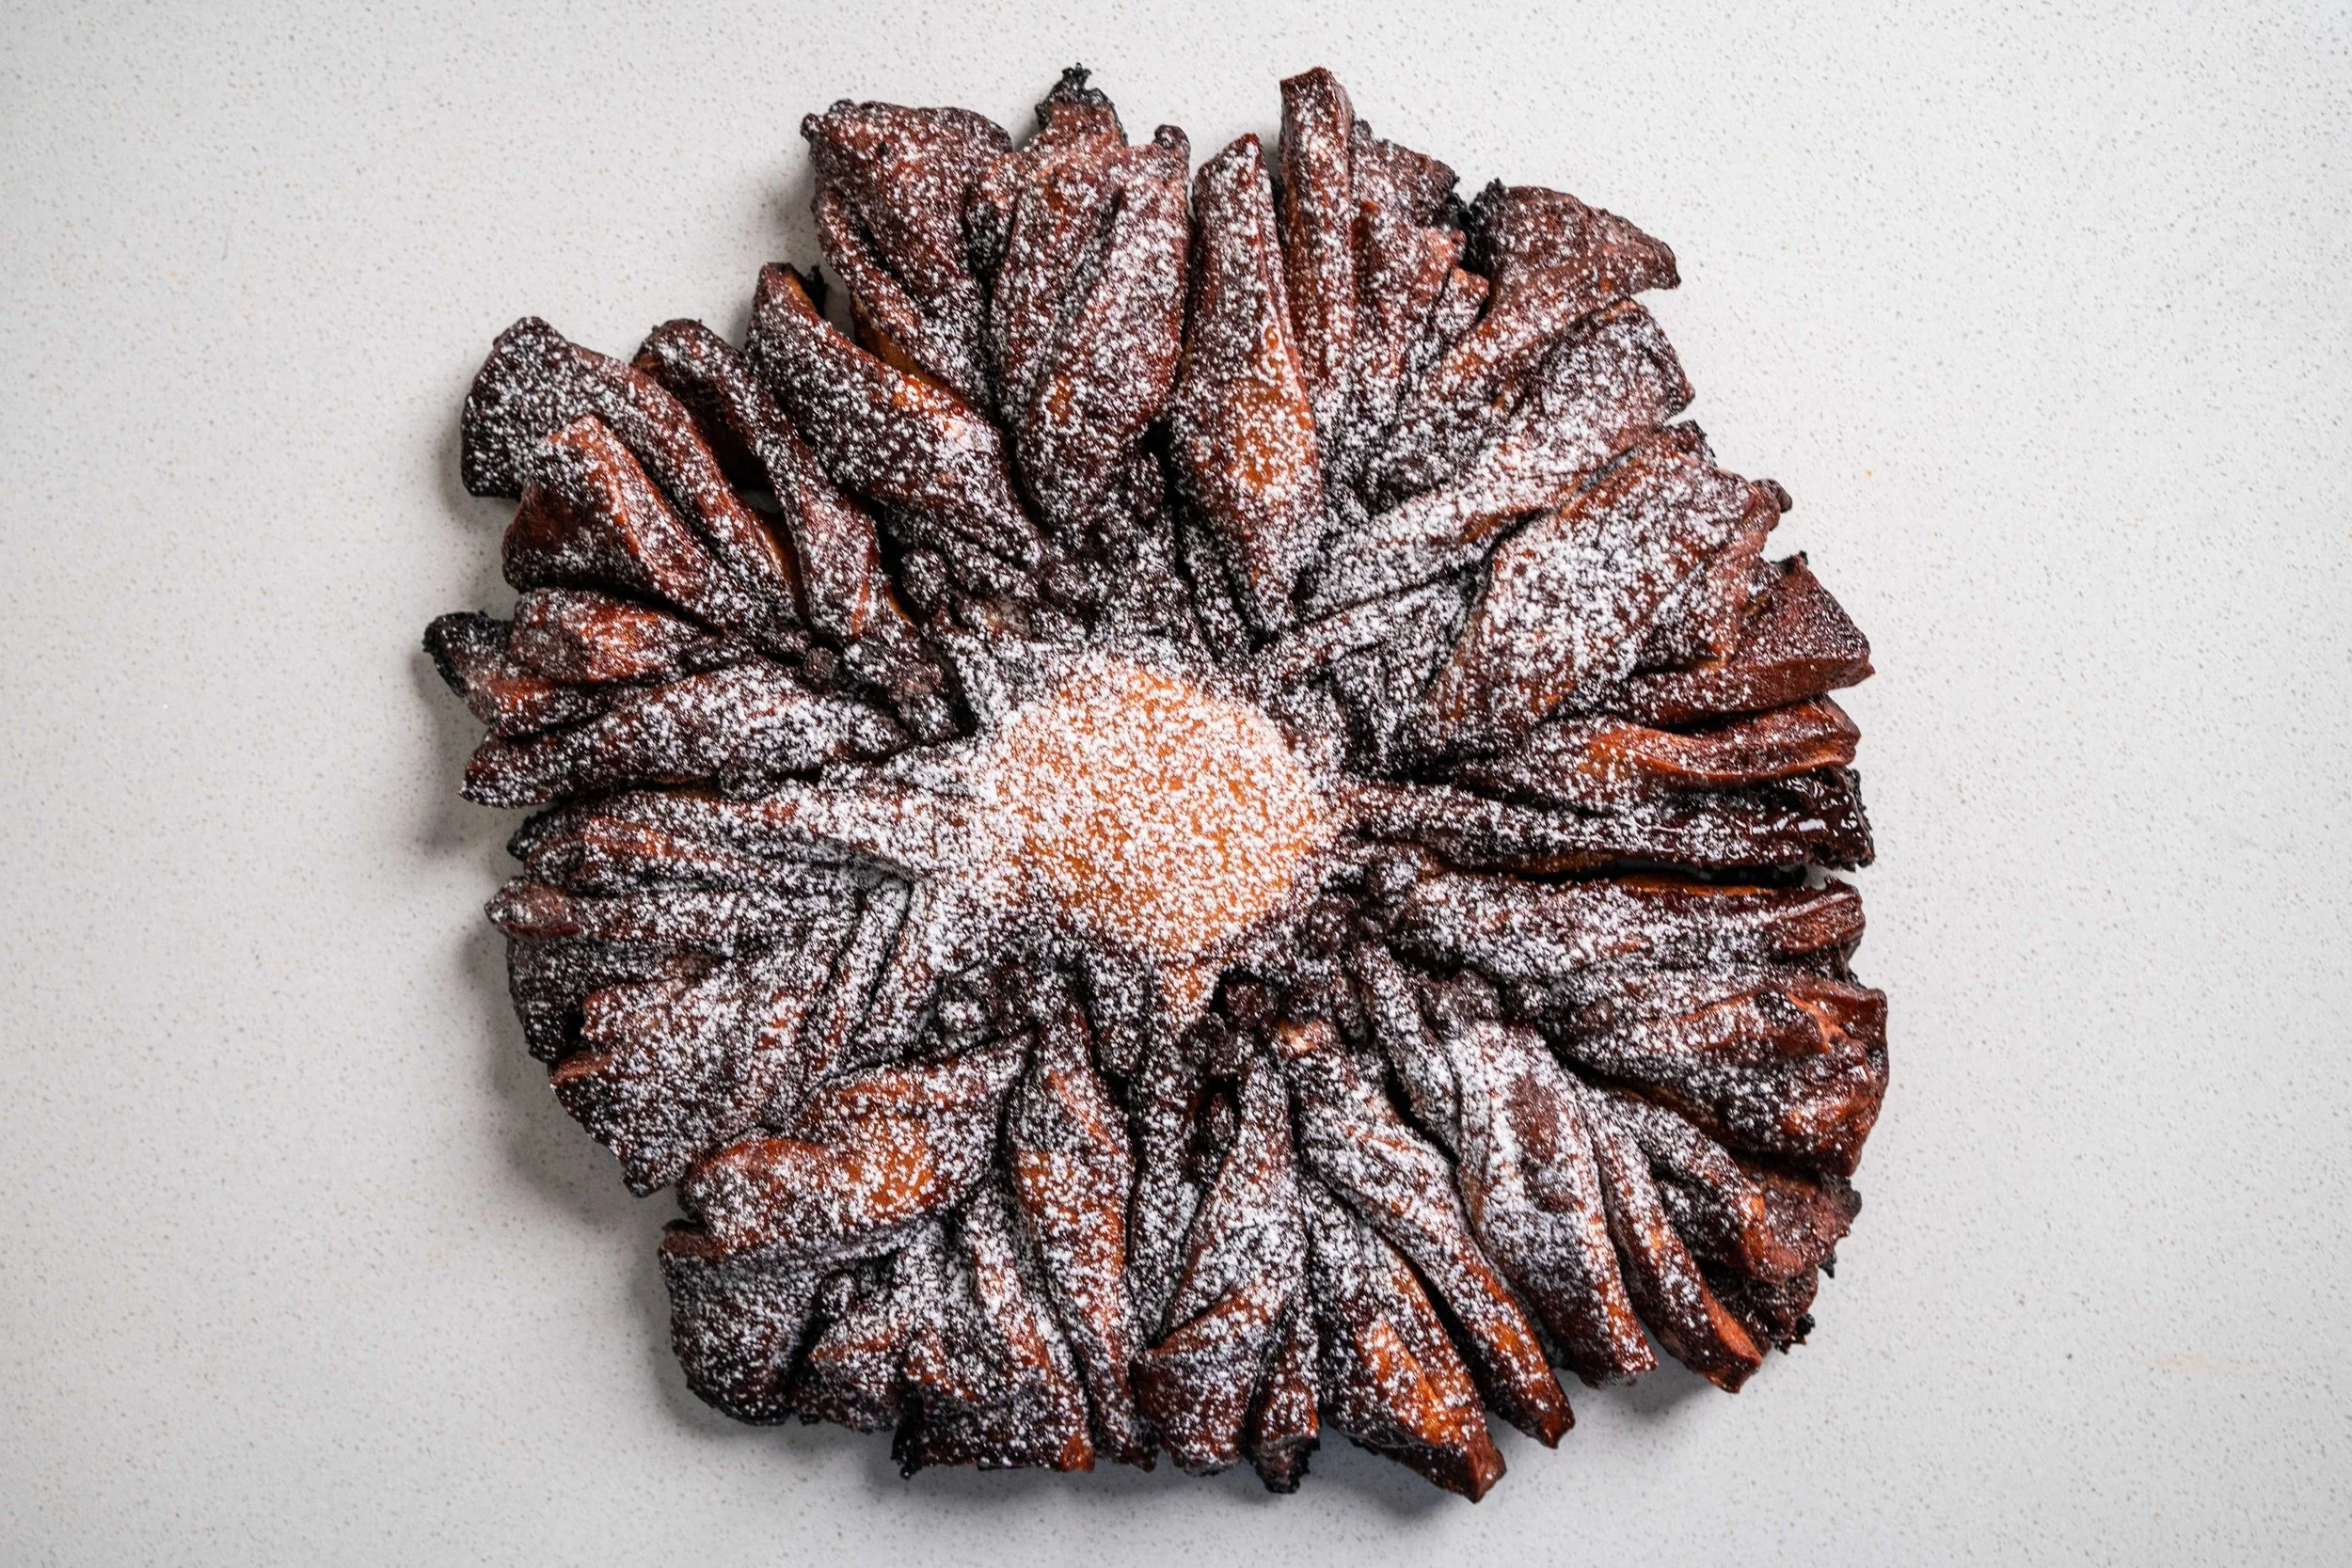
Chocolate Chili Castella Cake
My alliteration obsession is getting slightly out of hand. First there were those Crazy Chocolate-y Chocolate Cookies. Then came the Bak-kwa Burgers and Banana Baos. And most recently, I saw a video of a chocolate castella cake being made. A fleeting look at the name and I knew I had to try it out, not just for the jiggly chocolate-y mass it is, but also for the alliteration. “CCC”, after all, is just so very pleasing.
So I set aside an afternoon to make it. I melted the chocolate with some hot milk, folded it into some flour and cocoa powder, whipped up some meringue to give the cake the lift it needs, and put it all together into a fluffy batter. But just as I was transferring it into the cake tin, ready for its water-bath bake, I rogue thought crept into my mind. “What if I added another “C” onto the cake? No, not more chocolate (which is a great C), but how about... chili?”
It was as much of an “oh yes” moment as it was a “WTF” moment. Despite knowing chili and chocolate is a thing, I’ve actively avoided it all my life. From the outrage I felt when I first saw it on a Sainsbury’s shelf back when I was in London, to cringing at restaurant menus (and restaurants themselves) with any mention of chocolate and chili in the same line, to my refusal to even touch a chocolate chili bonbon offered to me by a disappointed friend. I just didn’t think I’d get it, didn’t even give it the chance to change my mind. But all this was years ago. My food mind has matured since (or so I’d like to think).
So there I was, a pack of gochugaru (Korean chili flakes) in one hand, staring down at my perfect cloud of a chocolate cake. I reached my other hand into the pack for a pinch, winced a little as I rubbed my chili-stained fingers atop the cake, tainting the chocolate with fiery flickers of gochugaru. Then, I hid my worried look from the cake as I popped it into the oven.
Fifteen minutes in, a nose-tickling scent of chili wafted out of the oven, a pinch of pepper was in the air, an aromatic linger of heat. I was entranced. By the time the cake was done, gone was the throat-choking punch of gochugaru, lost was its hair-raising tingliness. All that was left was a mellow mask of spice atop the castella cake, adding a bare hint of heat to the chocolate, a slight tingle as you mush the cloud cake into your mouth.
I’m chuffed this CCCC was a certain success. I guess, curiousity didn’t kill the cake. *badum-tss*


Chocolate Chili Castella Cake
Makes one 7-inch cake
Ingredients
Batter
100g (1 cup) all-purpose flour
15g (1 tablespoon) cornstarch
15g (1½ tablespoons) cocoa powder
80g (2.8 oz) chocolate
120g (½ cup) milk
8 egg yolks
60g (¼ cup) oil
8 egg whites
2g (½ teaspoon) salt
3ml (½ teaspoon) lemon juice
120g (½ cup + 1 tablespoon) sugar
Garnish
40g (1.4 oz) chocolate
20g gochugaru (Korean chili flakes), or more if you like a spicier kick
Directions
Making the flavour part of the batter: In a bowl, sift together the flour, cornstarch, and cocoa powder. Place the chocolate and milk in a separate, microwaveable bowl, and melt the chocolate in the microwave. This should take around 60 seconds on high power, or you could do this in a water bath as well. Then, add the oil and egg yolks to the dry ingredients, give it a quick mix until it comes together into a paste, then add in the chocolate milk. Stir and mix to combine it all, until a smooth batter forms.
Baking prep: Heat the oven to 160°C. Line a deep 7-inch cake tin with baking paper, and prepare a wider, shallower baking tray (I used a 10-inch). The reason we’re doing this is because the cake will be baked in a water bath, so we’ll be filling the wider tray with hot water, while the cake tin sits within it. So, with that in mind, this is a good time to boil some water too, approximately 500ml should do it.
Making the meringue part of the batter: Place the egg whites, salt, and lemon juice in a stand mixer fitted with a whisk attachment, and whisk it on high. After 1 minute of mixing, and the egg whites turn foamy, add in the sugar, and whisk it for another 2-3 minutes, until stiff peaks form.
Mixing the batter: Take about a quarter of the meringue, and mix it through with the chocolate batter. This will lighten the latter. Then, in 2-3 inclusions, gently fold the rest of the meringue into the batter, making sure there are no streaks of meringue remaining, but also being careful not to overmix and deflate the batter.
Into the tray: Scoop half of the batter into the lined cake tin, and smooth out the top with a spoon or spatula. Then, with a microplane or grater, grate the 40g of chocolate onto the batter, making sure to get an even coating throughout. (This step is totally optional, but it creates a thin layer of melted chocolate within the cake, which I think is sublime. And in fact, you can even try doing a double layer of chocolate, so placing 1/3 of the batter instead of the 1/2, and repeating the process once more.) When done, place the rest of the batter on top of the grated chocolate and first batter layer, then smooth out the top, and give it an even sprinkling of gochugaru.
Baking: Place the batter-filled cake tin within the larger tray, and fill the larger tray with water, until at least 1-inch of the cake tin is submerged. Then, pop this whole set-up into the oven (careful; don’t spill it!) and bake for 50-60 minutes, until a cake tester poked through the middle of the cake comes out clean.
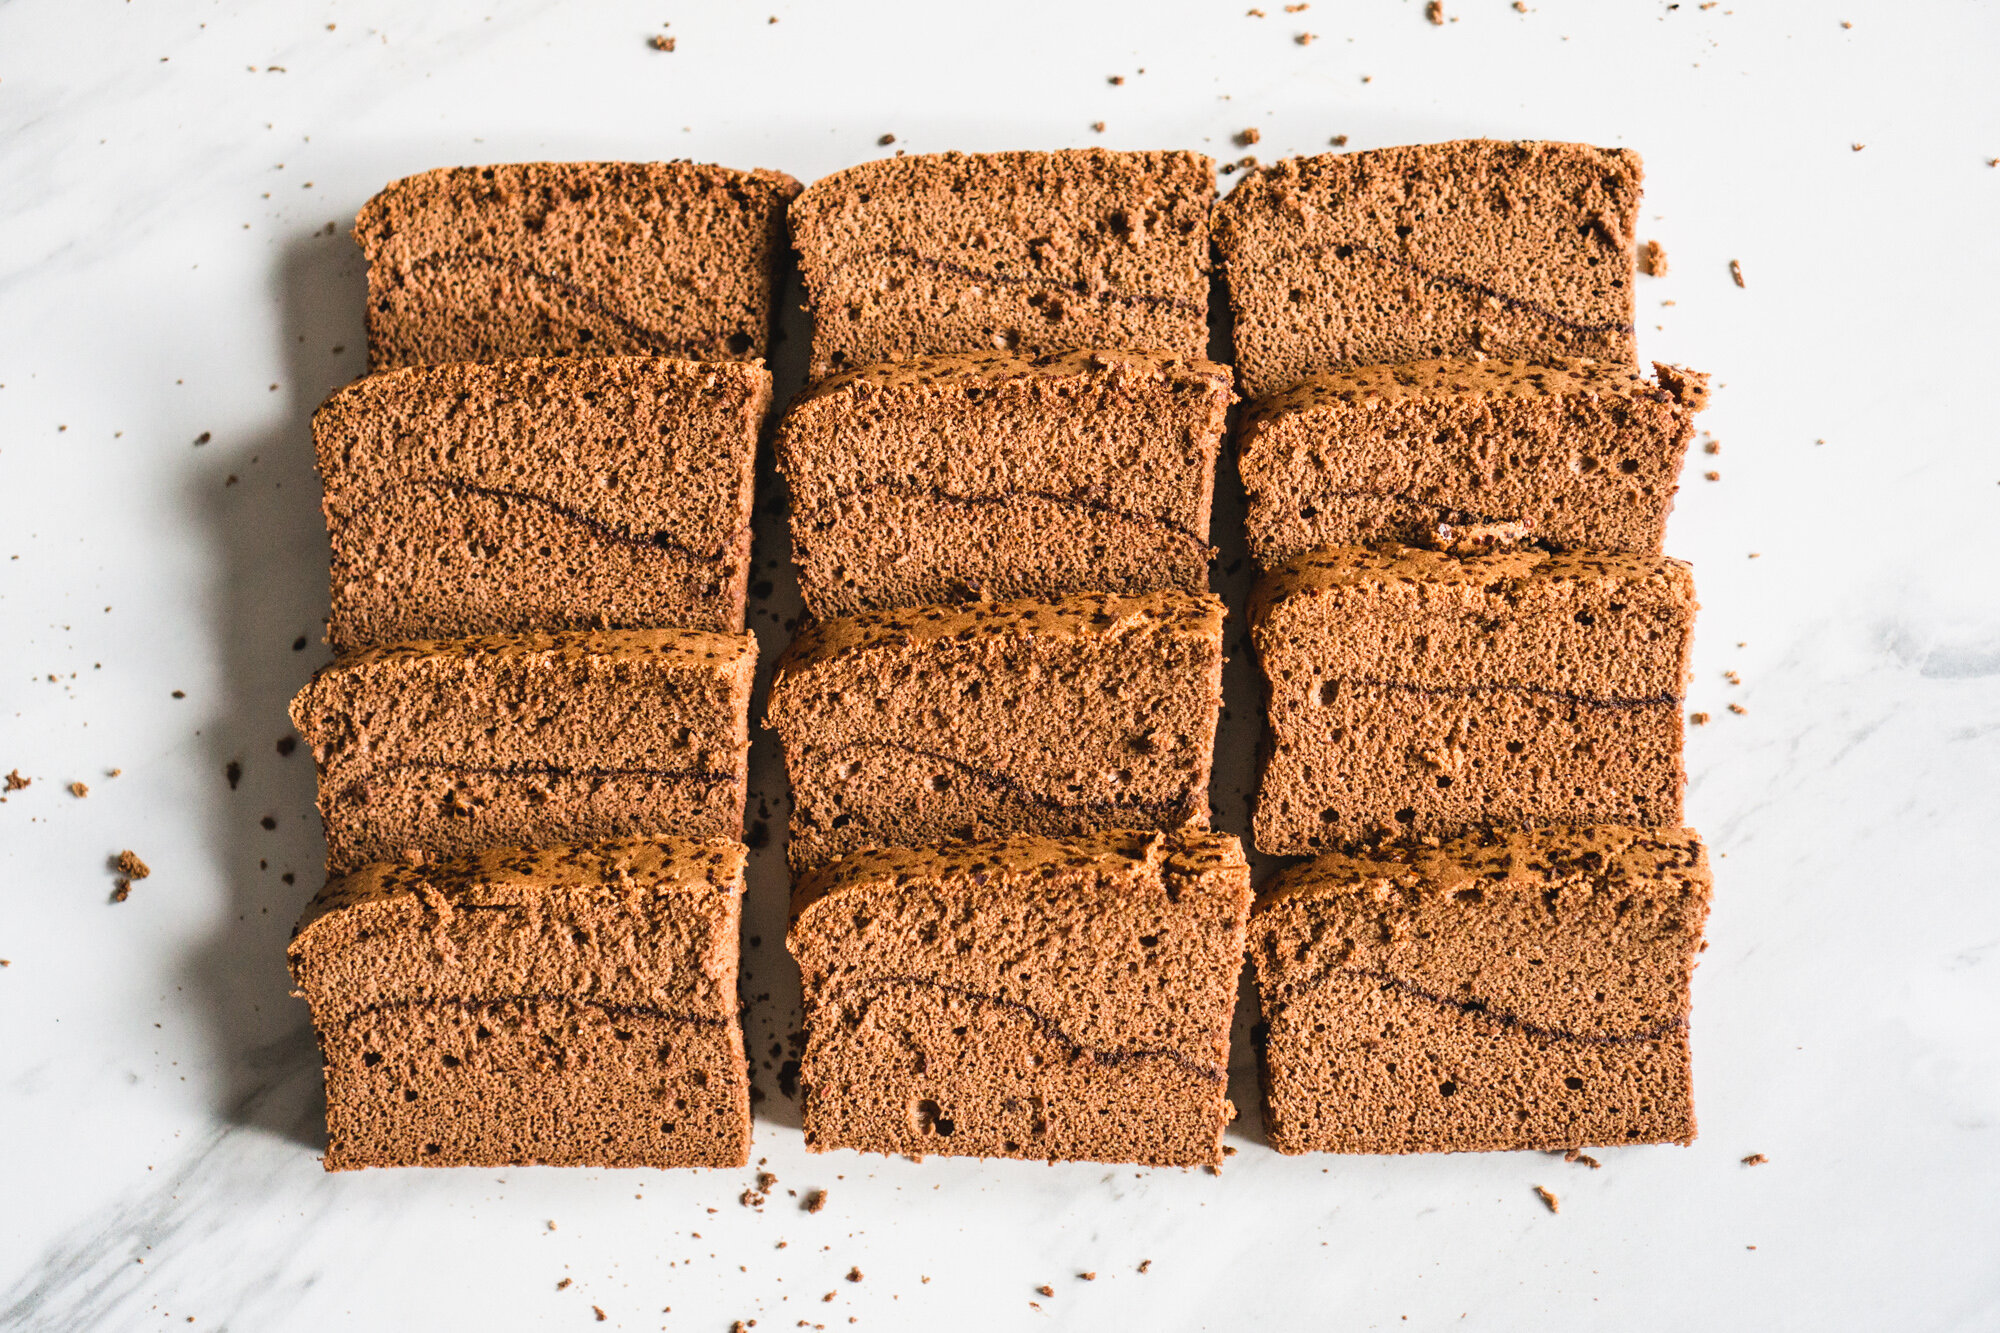
Eating: When the cake is done, take it out of the oven, and remove the cake tin from the water bath, and set it on a wire rack. After letting it cool for at least 15 minutes, remove the cake from the cake tin, tear away the baking paper, and leave it for a further 10 minutes, until it cools to room temperature. Then, slice the cake up into large slabs (or thin wedges if you’re tryna control yourself from eating too much), and eat!
More Fun Recipes!